
You’re not learning if you’re not humbled.
Good day, you beautiful people!
A lot has happened since my last post here on HuskyHacks, but that is not to say I’ve been slacking. Far from it, really. If you missed my more recent posts, that’s because they are over on VetSec! Go check them out here and here.
Besides that, I have a new member of my family who loves to crawl on my keyboard when I’m trying to type. But he’s so dang cute that I can’t stay mad at him.

What else has been taking up my time? The subject of this blog post, that’s what. I want to talk about my attempt to dive into the world of malware reverse engineering, how it humbled me to the ends of the earth, and what I learned.
In my academic experience, it’s always been the classes that I had the weakest academic performances in where I learned the most. I can think of three examples right off the bat of educational courses that marred my GPA but left lasting impressions on how I view the craft. For example, Intro to Programming at NEU destroyed me but helped me build skills that would inform how I approach scripting and programming. My senior project was a crash course in project management, which showed that I had a long way to go when it came to project management.
And the latest of these gauntlets was the Malware Reverse-Engineering course that I enrolled in at Rochester Institute of Technology. Many seasons after my undergraduate degree ended, I decided to step back in the ring with the most technical course I would attempt to date.
What followed was a 12-week white-knuckle crash course in one of the most technically dense subjects in cybersecurity. And I’m thankful for every god-forsaken minute I spent in that class.

How do you sum up the approach to malware reverse-engineering to someone who has never attempted it? My professor put it perfectly in one of the introduction lectures:
“In my Introduction to Programming course, I expect my students to document every line of their code. They must be able to explain, with precision, what each line of code means. In Malware Reverse-Engineering, the opposite is true. You are not attempting to explain what everything in a malware specimen does. Throw most of the code away and show me the biggest, most interesting, most important parts.”
The Prof
In malware RE, you’re not building bridges from blueprints. This is more of an alien autopsy, where the name of the game is to gather the most pressing facts, examine essential functions in detail, summarize what the malware does, and triage accordingly. Does this mean that malware RE might be easier than trying to get a good FizzBuzz algo in an Intro to Programming course?
Not even close. This course kicked my ass. And I’m a better practitioner because of it.
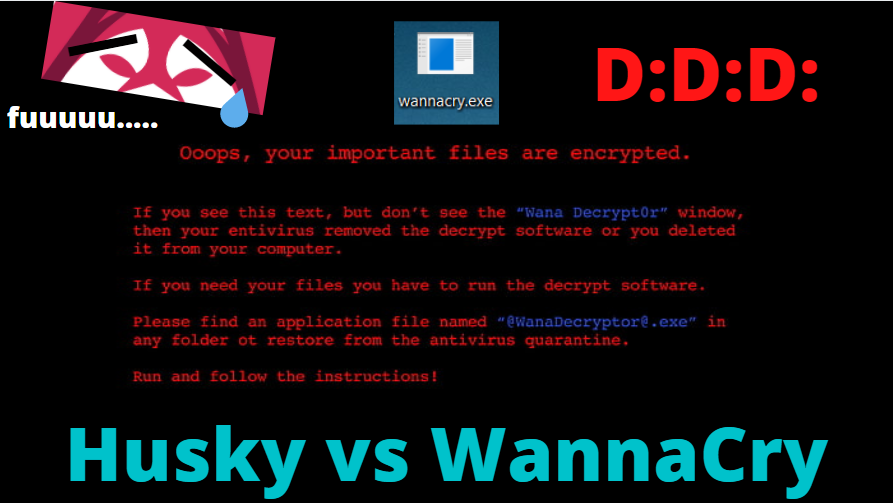
The final assignment of this course was to select a live piece of malware and perform a full analysis of the binary. I was never one to skate out of a challenge, so I decided to go for broke and reverse-engineer WannaCry, the most infamous piece of malware to date.
Alien Autopsy: Prep the Operating Room
So what is the methodology here? If you are like me, perhaps you’ve done some amount of penetration testing, network exploitation, or maybe even a buffer overflow or two, and find malware reverse-engineering to be too esoteric to crack into. I’ll try to demystify the process and put it into terms that I would have understood coming out of OSCP and PTP.
If you’re gonna be slicing into an alien spleen to figure out how it functions, you need a good toolkit. Leave Kali at home for this one: FlareVM and REMnux are your go to platforms. Realistically, most malware targets Windows hosts and users that love Windows (no love lost, but you guys are easy targets). So you’ll absolutely need a Windows workstation to gather some key facts during analysis. But suppose you want to save yourself from the risk of detonating malware and destroying your workstation. In that case, static analysis can be done to a Windows binary on a Linux workstation to mitigate this possibility.
The Method
Alright, so you’ve installed FlareVM and REMnux and found a juicy malware binary. After checking to make sure your analyst workstation is isolated from your home network, you’re wondering what to do next. Generally speaking, you’ll be performing four major stages of analysis on this binary:
- Basic static analysis: collecting basic facts about the binary without running (detonating) it. Your tools for this stage might include Strings, FLOSS, PEView, and any kind of unpacker.
- Basic dynamic analysis: collecting key facts about the binary after detonating it. Your tools for this stage might include Wireshark, an internet simulator like inetsim or Fakenet-NG, a DNS emulator like ApateDNS, Procmon, and a registry analysis tool like RegShot.
- Advanced static analysis: in-depth analysis of the binary’s disassembled code without running it. Your go-to tools for this stage are usually IDA and Ghidra.
- Advanced dynamic analysis: in-depth analysis of the binary’s functions using a debugger after detonating it. Use Olly, Immunity, x32debug – doesn’t matter which one.
And finally, you’ll summarize the findings and hopefully tell your CEO how you plan on getting rid of the infestation. In a real-life scenario, that is. In this class, I wrote my report about WannaCry and left it at “restore from backup and try to be more careful next time.
Obligatory warning: this covers the steps I took on a live sample of malware. I shouldn’t have to explain why you need to be careful if you want to follow along. And if you don’t heed this warning, well, get some Bitcoin ready to fork over.
With shaky hands but steady resolve, I downloaded WannaCry from theZoo’s Github repository and loaded it onto my REMnux and FlareVM hosts. Just for kicks, I took a snapshot of me FlareVM host and detonated the malware, which promptly sent a chill down my spine.

Basic Static Analysis
I reverted and began static analysis. I took the MD5sum hash of the file and submitted it to Virustotal. Surprise, surprise, it lit up like a Christmas tree:

By running Strings and FLOSS against the binary, you unearth some interesting text strings that might be hiding in there. In this case, I found some of the functions that the malware calls at detonation and some references to executables. The info that comes from this stage is hit or miss; it might make more sense after you perform the later stages, but hold onto it for now. For example, I didn’t know what ‘taskche.exe’ might be at the time, but I came to find out that it’s the name of the payload delivery mechanism and how the malware stays on your system.


Basic Dynamic Analysis
Basic dynamic analysis is all about running the binary and seeing what happens. In this case, I used my REMnux host as the internet emulator to see if the malware would try to phone home. Indeed, it does.

It looks like taskhsvc.exe attempts some outbound connections, as well as the WannaDecrpytor binary that is installed at detonation.
Most interestingly, the malware also tries to connect to the infamous kill-switch domain. If you’re familiar with the story of WannaCry, Marcus Hutchins decided to register this domain after seeing it in the disassembled code to get an idea of how many infections had occurred and ended up inadvertently stopping the outbreak.

Advanced Dynamic Analysis
This is where the analysis can get way in the weeds, so I’ll keep it to the highlights. The kill-switch domain mentioned in the previous section is very easy to find during the debugging process:

You can see the logic conditions for the killswitch here. If the InternetOpenUrlA call does not return anything, the program ignores the jump call and goes into the wannacry.4081BC function. But if it does return a result, it makes the jump call down the CALL ESI instruction, which cleans up the program and returns without executing anything further:

But the program didn’t receive a callback from that URL, so it goes into that wannacry.408090 call:

Something surprising I realized was that the initial malware detonation does not perform the encryption of your hard drive. It installs a secondary payload which adds a key into your registry to autorun at boot up, which performs the encryption function and displays that super scary message. This reinforces a point that my professor mentioned: most malware acts in stages, where the first payload is a tiny, facilitating action that brings on the full force of the rest of the binary.
Advanced Static Analysis
Finally, I dropped the binary into Ghidra and tore it apart. Highlights from this section include the DNS kill switch domain mentioned previously:

…the kill switch function itself:

…and the function that unpacks and installs the stage 2 payload:

And before I went to the ends of the earth to try to find the encryption function and possibly determine the key to reverse the encryption, I realized that I had already performed a full triage of the malware’s key functions. I completed something I had once thought was too esoteric for me to figure out.
I had sliced into the alien’s spleen, and had a book full of notes on how it functioned. So I decided to write my report and submit it.
Summary
The course was not easy. I ended up with an unremarkable academic performance. But failure is the best teacher, as they say.
I’m very much looking forward to expanding this skill. I’m definitely weakest in advanced dynamic analysis and debugging, but seem to be much better at disassembling with IDA and Ghidra.
And really, none of this is new information: there are tons of guides on WannaCry out there for you to peruse.
But that’s not the point. The point is that this was my take, my attempt, and my perspective on malware reverse-engineering. It was not easy by any means, but I’m a better practitioner because of it.
